The Road Ahead
Now that you have a solid understanding of the basics of p5.js, we’re going to spend our final lessons looking at some of the more advanced (and cool!) features of it. We’ll start by looking at ways to move, rotate, and resize (scale) graphical objects. After that, we’ll talk about working with images, fonts, and sound.
What are Transformations?
The word transformation means to change something from one form to another. If you’ve studied geometry in math class you might be familiar with the concepts of translations, rotations, reflections, and scaling. If not, don’t worry! These words sound fancy, but they are simple ideas. In this lesson, we’ll look at how to perform basic transformations in p5.js.
Translations
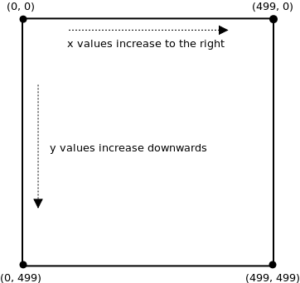 You know that p5.js treats the Canvas as a grid of pixels, each with an RGB (and alpha) value as well as an (x,y) coordinate. By default, the top-left corner is at coordinate (0,0), is this called the origin point. From the origin, x values increase to the right, and y values increase downwards.
The term translation means to move. In p5.js, translation means that we move the origin to some other coordinate. Everything we draw from that point on will be relative to the new origin. For example:
|
1 2 3 4 5 6 7 8 9 10 11 |
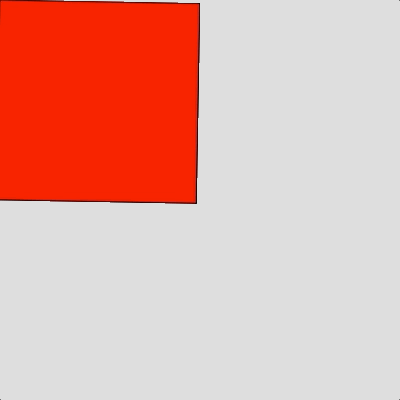
function setup() { createCanvas(400, 400) } function draw() { background(220) fill(255,0,0) // translate(50,50) // translate(mouseX, mouseY) rect(0,0,200,200) } |
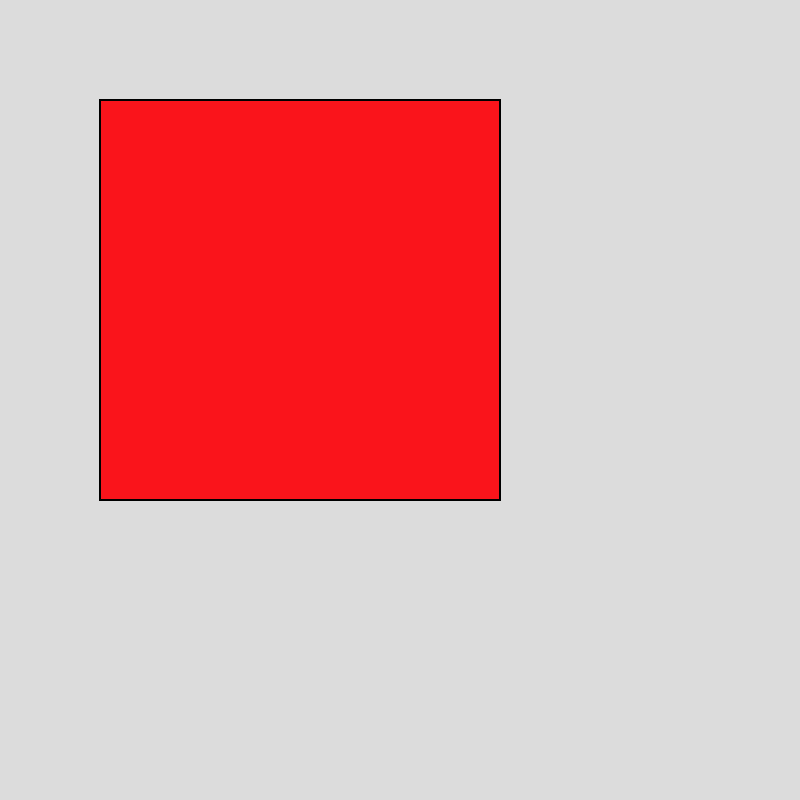 Try this example, then uncomment line 8 and try it again. Using the translate() function we can change the location of the origin point. You will note that even though we specify that the rectangle should be drawn at (0,0) this is actually translated (moved) relative to the new origin (50,50).
Translation is just another way of changing the position of shapes. We could have drawn the rectangle by specifying:
rect(50,50,200,200)
instead of using:
translate(50,50)
The visual result would be the same. This new way of positioning shapes might seem odd, but it’s actually quite common. Translation is a way of separating the positioning of an object from its shape.
Rotations
Another useful transformation is rotation. This means that we turn (i.e., rotate) the entire coordinate system around the origin either clockwise or counterclockwise. As with drawing arcs, the default way to measure angles is in radians. But if (like me) you think better in degrees, we can use the radians() function to convert angles from degrees into radians for us. Here’s an example:
|
1 2 3 4 5 6 7 8 9 10 |
function setup() { createCanvas(400, 400) } function draw() { background(220) fill(255,0,0) rotate(radians(45)) rect(0,0,200,200) } |
 Line 8 tells p5.js that whatever is drawn should be rotated 45 degrees clockwise around the origin (0,0). We can easily animate this effect by adding an angle variable:
|
1 2 3 4 5 6 7 8 9 10 11 12 13 |
let angle = 0 function setup() { createCanvas(400, 400) } function draw() { background(220) fill(255,0,0) rotate(radians(angle)) rect(0,0,200,200) angle = angle + 1 } |
Try playing around with the (x,y) position of the rectangle to see how this works. You can also control the speed and direction of rotation by changing angle calculation on line 12.
Translations + Rotations
If you try to have the rectangle rotate (spin) in the centre of the canvas you’ll discover a problem. The rotate() function always turns the entire coordinate system around the origin, which is at (0,0) by default. In the previous example, if you draw the rectangle using rect(100,100,200,200) you’ll see what I mean.
The correct way to rotate/spin the rectangle in the centre of the canvas involves using translate() to change the position of the origin before rotating. In other words, we need to (1) translate() the origin (the point we want to rotate around) to (200,200), (2) rotate() the entire coordinate system around this new origin, and (3) draw the rect() centred at the new origin. Here’s the code to do this:
|
1 2 3 4 5 6 7 8 9 10 11 12 13 14 15 16 |
let angle = 0 function setup() { createCanvas(400, 400) } function draw() { background(220) translate(200,200) rotate(radians(angle)) fill(255,0,0) //rectMode(CENTER) rect(0,0,200,200) angle-- } |
This code positions the top-left corner of the rectangle at the new origin (200,200) then rotates it around that point. Try uncommenting line 13 to see how to position the centre of the rect() at (200,200) and then rotate/spin. As usual, the order of statements matters! Try reversing the order of lines 9 and 10 and observe what happens.
Rotating More Than One Shape
Let’s try spinning 2 rectangles! Here’s a first attempt at the code for this:
|
1 2 3 4 5 6 7 8 9 10 11 12 13 14 15 16 17 18 19 20 21 22 23 24 25 |
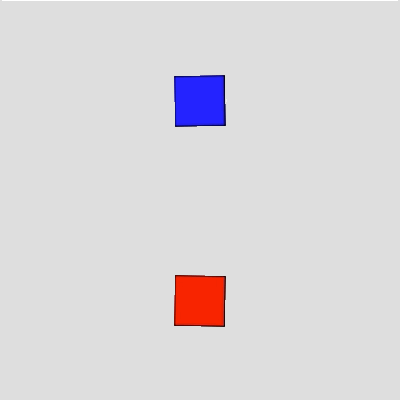
let redAngle = 0 let blueAngle = 0 function setup() { createCanvas(400, 400) } function draw() { background(220) rectMode(CENTER) // red square translate(200, 300) rotate(radians(redAngle)) fill(255, 0, 0); rect(0, 0, 50, 50) redAngle = redAngle + 1 // blue square translate(200, 100) rotate(radians(blueAngle)) fill(0, 0, 255) rect(0, 0, 50, 50) blueAngle = blueAngle - 1 } |
Try this code — the red square rotates as you might expect, but the blue square does not!
 Remember that translation and rotation affect the entire canvas and all objects on it. The first translate() and rotate() functions do what we expect to the red square, but they are still in effect when we get to the blue square. The origin for the top-left of the blue square does not start at (100,100) but is in relation to the top-left (origin) of the red square at (200,200). As a result, the top left of the blue square starts at (300, 300) on the canvas; i.e., (200+100, 200+100). Similarly, the rotate() function for red square rotates 1 degree clockwise, then the rotate() function for the blue square rotates 1 degree counter-clockwise – cancelling out its spin. Play around with this code to get a sense of how it (doesn’t really) work.
One solution to this problem is to undo the effects of the first translate() and rotate() functions for the red square, and then reapply them for the blue square like so:
|
1 2 3 4 5 6 7 8 9 10 11 12 13 14 15 16 17 18 19 20 21 22 23 24 25 26 27 28 29 |
let redAngle = 0 let blueAngle = 0 function setup() { createCanvas(400, 400) } function draw() { background(220) rectMode(CENTER) // red square translate(200, 300) rotate(radians(redAngle)) fill(255, 0, 0); rect(0, 0, 50, 50) redAngle = redAngle + 1 // reset/undo previous rotation and translation rotate(-radians(redAngle)); translate(-200, -300); // blue square translate(200, 100) rotate(radians(blueAngle)) fill(0, 0, 255) rect(0, 0, 50, 50) blueAngle = blueAngle - 1 } |
This works, but there is a better way!
p5.js includes two built-in functions to save and restore the coordinate system for the canvas. Here is the final version of the code using push() and pop():
|
1 2 3 4 5 6 7 8 9 10 11 12 13 14 15 16 17 18 19 20 21 22 23 24 25 26 27 28 29 30 |
let redAngle = 0 let blueAngle = 0 function setup() { createCanvas(400, 400) } function draw() { background(220) rectMode(CENTER) // red square push() translate(200, 300) rotate(radians(redAngle)) fill(255, 0, 0) rect(0, 0, 50, 50) redAngle = redAngle + 1 pop() // blue square push() translate(200, 100) rotate(radians(blueAngle)) fill(0, 0, 255) rect(0, 0, 50, 50) blueAngle = blueAngle - 1 pop() } |
 On line 13, push() saves the current translation and rotation of the canvas is stored in memory and the coordinate system is reset so that there are no rotations and the origin is at (0,0). After translating, rotating, and drawing the red square, pop() is called on line 19. The pop() function restores the saved translation and rotation of the canvas. Together these functions simply applying transformations to more than one shape at a time without having to figure out how to undo transformations and rotations between shapes.
I indented the code between push() and pop() just to make it a little clearer, you do not need to indent like this but you can if you like.
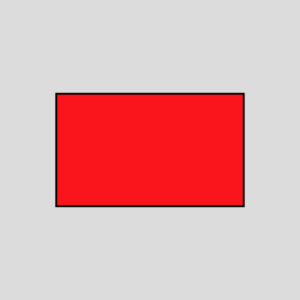
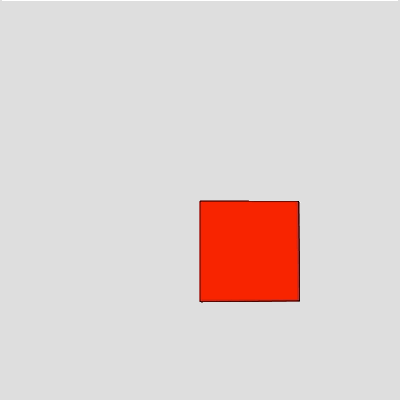
Scale
The scale() function allows us to stretch or compress the coordinates on the canvas by a given decimal percentage; for example, scale(1.5) means to increase the size to 150%. What this will do is effectively expand or shrink the size of any shapes we draw.
|
1 2 3 4 5 6 7 8 9 10 |
function setup() { createCanvas(400, 400) } function draw() { background(220) scale(2.5) fill(255, 0, 0) rect(30,50,100,60) } |
 On line 7, the scale() function is used to tell p5.js that any shapes are drawn from that point on should be 2.5 times larger. The result of this is that the rectangle is drawn with its top-left corner at (75,125) with a width of 250 and height of 180. Notice that even the strokeWeight is increased accordingly.
As with rotations and translations, if you are drawing more than one shape you can use the push() and pop() functions to store and restore the drawing state between shapes.
You Try!
-
-
- A snowman consists of 3 circles stacked on top of each other. Draw a snowman that follows the mouse pointer. Use translate to do all the movement. Your ellipse() statements should only contain numbers as arguments.
- Write a program that draws a triangle, one of whose corners is at (200,1000). Make the triangle continuously rotate around (200,100).
- Write a program that draws a windmill blade. The blade should rotate around the centre (red dot) and the entire blade should be visible on the canvas at all times.
- p5.js supports “3D Rotations”. This topic gets into grade 12 math, but the default axis for rotation in p5.js is called the z-axis. You can also rotate around the x-axis and/or y-axis. To do this requires an additional WEBGL argument to the createCanvas() function:
createCanvas(400, 400, WEBGL) After that, you can use functions rotateX() and rotateY() to rotate shapes in other directions. Research these functions in the p5.js online reference [ https://p5js.org/reference/ ] and create a short example to demonstrate how 3D rotation works!
-