“Our goal is not just a single device. Our vision is a mobile platform that runs on many different devices.” — Eric Schmidt (Google CEO, circa 2011)
The Road Ahead
 One of the great advantages of learning Java is that it’s the development language chosen by Google for its Android platform. To conclude this Java tutorial, we’ll spend time learning the basics of Android app development! Like Swing, entire books have been written on this topic. My intention here is to help you get on the road to producing intermediate-level apps and to provide you with a solid foundation for further study.
Android development is a lot of fun, but can be intimidating because the Android API is massive and constantly evolving, and key parts of the app development process do not involve writing or understanding code but knowing how to effectively use the Android Studio development tools.
For this reason, about half of my notes will include detailed click-by-click instructions for tasks that you will need to accomplish in Android Studio, and the other half will focus on actual Java and XML code with explanations. The best way to learn, of course, is to get your hands dirty so I encourage you to try every example and exercise in the notes and to not be afraid to experiment.
An Overview of Android Development
Android is a Linux-based operating system (OS) designed to run on mobile devices with touchscreen interfaces. Android runs on the majority of the world’s tablets and phones. The other significant player is Apple’s iOS. iOS apps are written in the Swift or Objective-C languages, both of which are quite different from Java. Since Android apps are written in Java, and all of the tools we need are free from Google, this makes it an ideal platform for us to learn at this point.
Java was created more than 10 years before smart phones and tablets existed. Since mobile devices have limited processing power and battery life, Android apps must run using a special virtual machine called the Dalvik Virtual Machine. The Dalvik VM cannot run standard Java bytecode (.class) files. An extra compilation step is required to produce a special type of bytecode file called a Dalvik Executable (with a .dex extension).

This is why a regular Java application cannot run directly on an Android device, and why your favourite Android app doesn’t run on your desktop computer.
Required Tools
Since many of the classes in the regular Java API (e.g., Swing classes) are not relevant to Android apps, Google has developed its own Android API — be sure to bookmark this for future reference! The Android API consists of a subset of the packages from the Java API and includes dozens of new Android specific packages. It’s well worth your time to explore the Android API to see what’s available to you.
In terms of software, you should already have JDK 8 installed and working on your computer. Dr. Java has been a fantastic environment for learning Java syntax, but to create Android apps we will need a more specialized tool. Google provides free software called Android Studio that runs on Windows, Mac, and Linux. I won’t cover installing Android Studio here, it’s pretty straightforward and Google provides lots of helpful (troubleshooting) instructions. Expect to spend at least an hour or two getting Android Studio installed.
Hello World! App
After you have installed Android Studio, we can build our first app!
- Run Android Studio. The first time you start Android Studio you will be asked a number of setup questions. Just keep clicking Next to leave all the default options, and Finish to end. This first-time setup process will involve downloading a number of components. This may take a while depending on your network speed.
- Once Android Studio has started, you will see a window something like this:
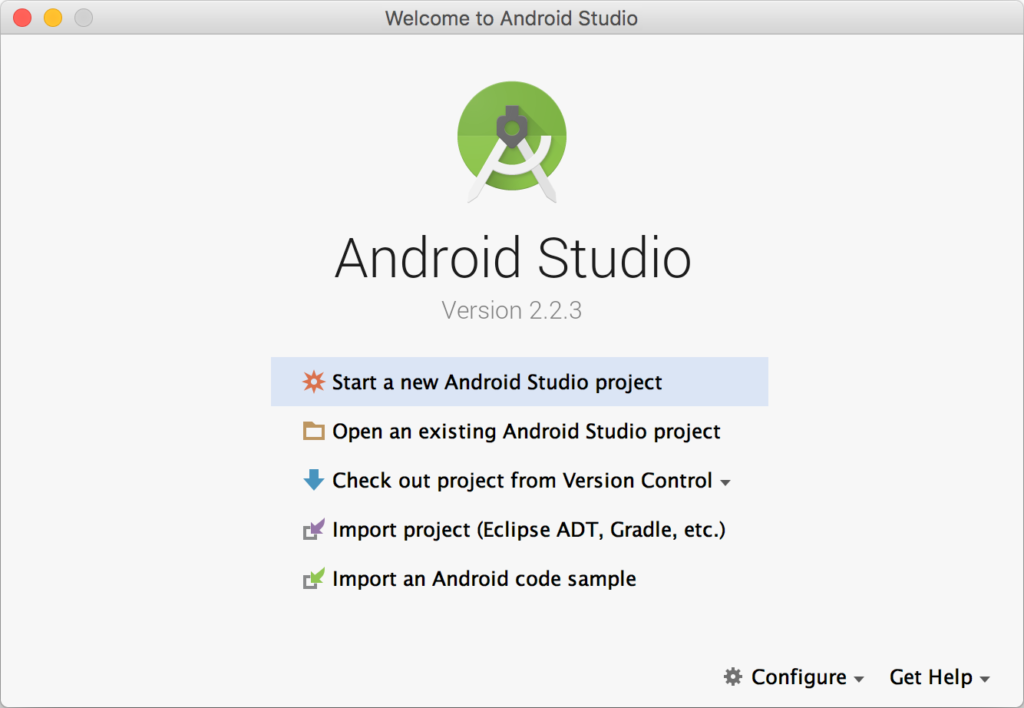
- Click to Start a new Android Studio project.
- The Create New Project window will appear.
 Set the Application name: to “Hello World!”. For the Project location:, choose a folder that you will be able to easily access (on your desktop somewhere would be a good choice). Leave the other fields with their default values, and click Next.
 - The Target Android Devices screen will appear. Android has evolved a great deal since its launch in 2008. Google publishes detailed statistics to help developers target their apps to work on the greatest number of Android devices (and screen sizes) as possible. As of this writing, most developers choose Android 4.0.3 (API 15) as the minimum API level to support since it supports ~99% of Android devices in the market. Click Next, to accept the default.
- On the Add an Activity to Mobile screen, select Basic Activity and click Next.
- On the Configure Activity screen, leave the defaults and click Finish.
Assuming your Android Studio is installed correctly, it should generate a starting project for your app.
A Tour of Android Studio
The user interface for Android Studio can be quite overwhelming compared to Dr. Java! The main window is divided into several tool windows.
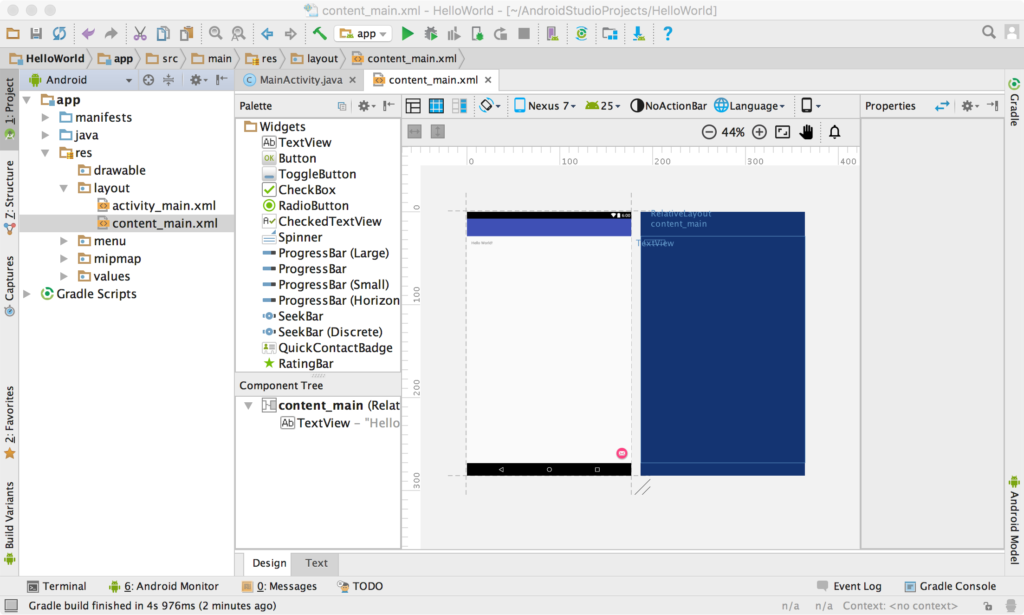
On the far left is the Project tool window that displays all of the directories and files that make up an Android project. You can minimize and maximize it by clicking the Project tab on the left side of the main window. To expand or collapse project subfolders, click the small triangle beside each subfolder.
So far we haven’t typed any code, but Android Studio has generated a lot of code for us to get the project started. Let’s look at a few of the key files it generates.
Layout (.xml) Files
The .xml files in the app > res > layout folder define how the interface will look. Since we just created this project, the content_main.xml file is currently selected.
In the middle of the Android Studio window you’ll see what our current app design looks like visually. On the left of the visual editor is a Palette tool window containing GUI components that you can drag-and-drop into the visual design area. If you click on a component in the visual layout (e.g., the “Hello World” text) you will see the attributes for that component appear to the right in a Attributes tool window.
To see the actual XML code for the visual design, click the Text tab at the bottom of the Palette tool window. Clicking the Design tab will bring you back to the graphical view. Any change you make to the XML will be reflected in the design, and any change you make using the visual editor will be reflected in the XML. While the XML looks a lot more intimidating than the user-friendly visual editor, with experience you’ll become very comfortable manipulating the XML code directly.
To see how your app will look on devices with different sized screens there is a pull-down menu at the top of the visual editor. I happen to have an older Nexus 7 tablet, so I have chosen “Nexus 7 (2012) (7”, 800 x 1280: tvdpi)” from the list.
Code (.java) Files
You’ll find the .java files for the project in the app > java folder within a package for your app. When we created the project we left the default value “MainActivity” so that is currently the name of our class.
To rename a class (and file), right-click it in the Project tool, select Refactor > Rename, then enter a new name for the class. This will automatically change all references to the class and its filename throughout the project. We’ll get into the actual details of the code in future lessons, just have a look for now.
Creating an Android Virtual Device
Before we can run our app, we need to create an Android Virtual Device to run it on. An AVD is a software emulator that runs the actual Android OS within a window. AVDs are a handy (and free!) way of testing your app on different Android devices without actually having the physical devices to test on. However, as you’ll see, starting the emulator is slow and since you interact with it using your mouse instead of touch gestures it’s not quite the same user experience.
To create a new AVD:
- Click the Tools menu, then AVD Manager.
- In the window that appears, click the Create Virtual Device button at the bottom-left.
- On the Select Hardware screen you will see a wide range of virtual Android devices. Again, since I have an older Nexus 7 tablet, I’ve chosen that as my device for consistency.
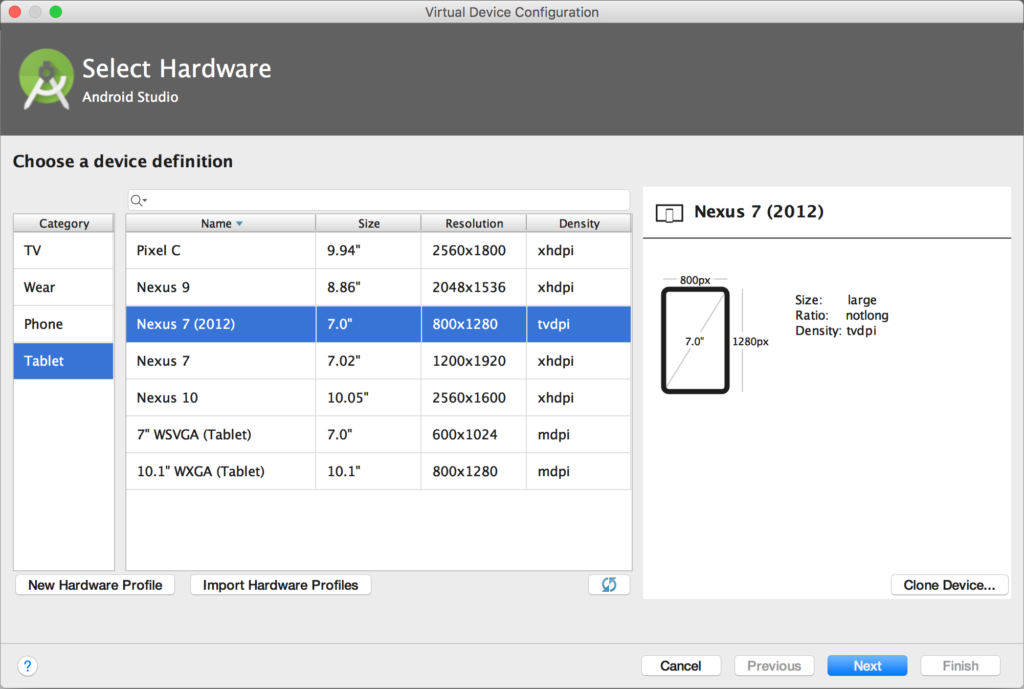
- Once you’ve chosen a device, click Next to continue.
- On the System Image screen, choose the version of Android OS you would like the emulator to run and click the Download Since my tablet runs Android 5.1, I chose Lollipop (API 22, x86). Note: The x86 versions of the System images will run faster in the emulator than x86_64 versions.
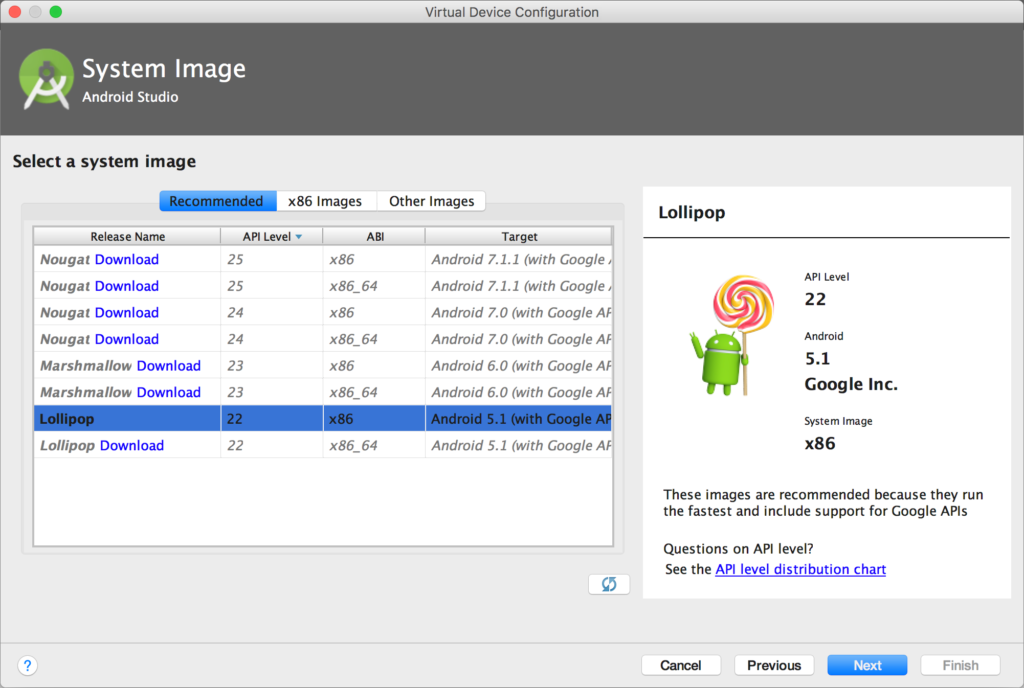
- It will take some time to download and install the system image so go have a snack. When the download is complete, click Next.
- Finally, you can configure settings for the AVD. The default name for my AVD was “Nexus 7 (2012) API 22” but I found that the brackets later confused Android Studio, so I have renamed the image “Nexus 7 2012 API 22”, as shown.
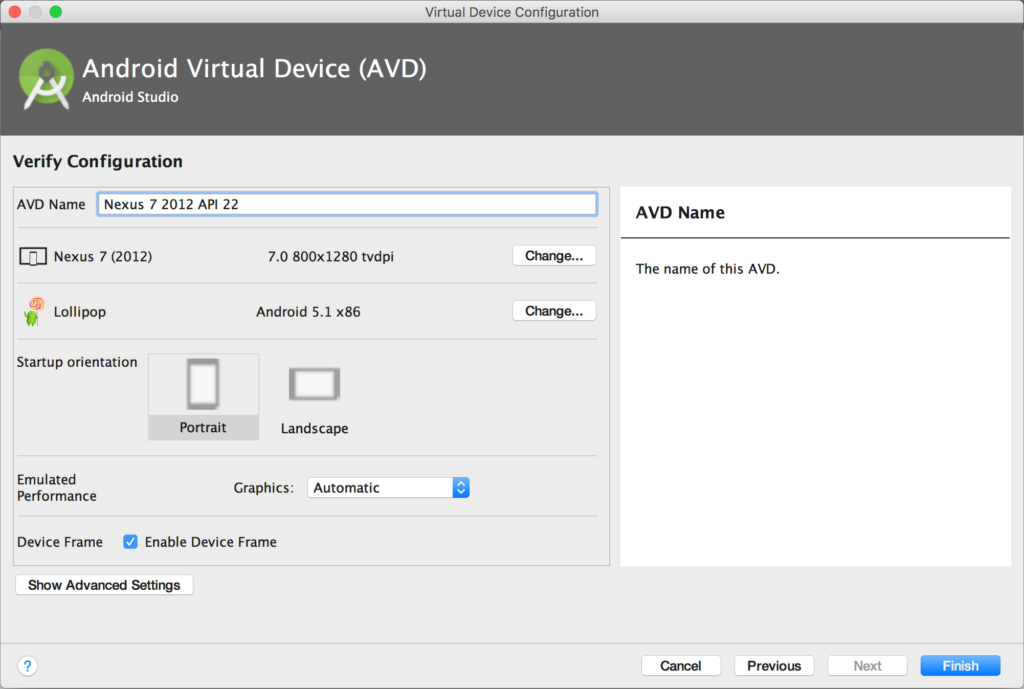
- Click Finish. Then close the AVD Manager window.
One last point before we move on. To improve the speed of AVDs, Android Studio normally installs the Intel x86 Emulator Accelerator software (a.k.a. the HAXM installer). If you ever see warning messages about this software being missing you can install it yourself from the Tools menu > SDK Manager. In the window that appears, click the SDK Tools tab, and then click to select the HAXM installer. Click the Apply button to install it.
Running an App on an AVD
Now that we have our AVD ready to go, click the green ![]() Run (^R) button at the top of the Android Studio window to run the app.
Run (^R) button at the top of the Android Studio window to run the app.
Since this is our first time running the app, you’ll be presented with a list of any connected Android devices (we have haven’t plugged in any it yet) and available AVDs (we’ve only created one at this point). Click to select your AVD and then click the OK button.
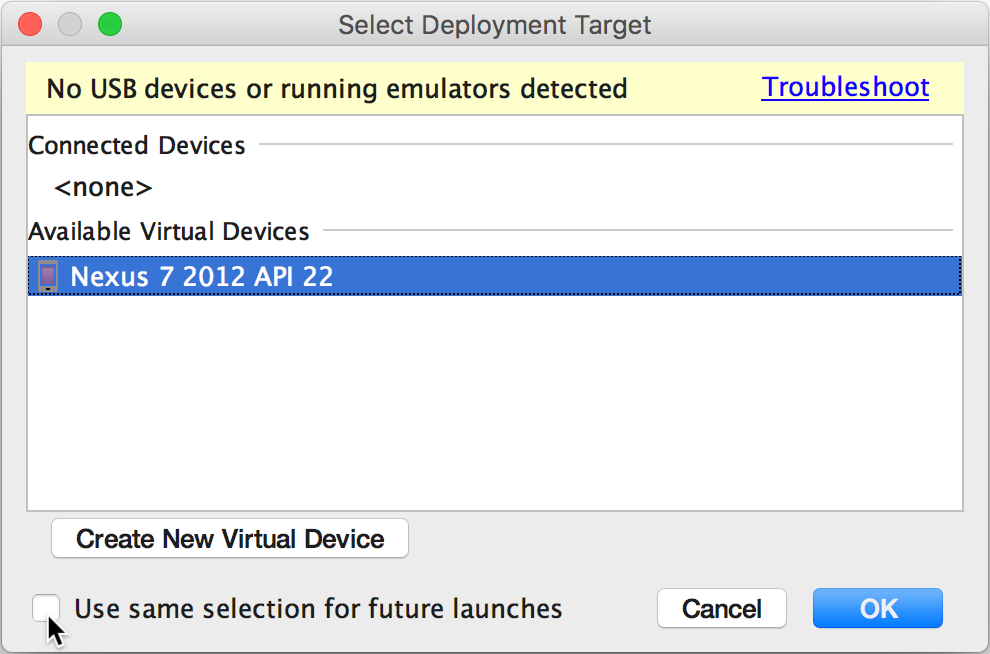
For convenience, you can select the Use same selection for future launches checkbox at the bottom left of the window so that you can skip this step every time you run the app.
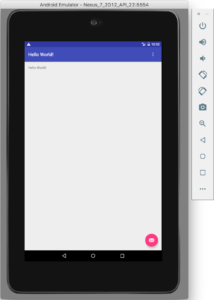 Clicking the Run
 ![]() button kicks off a series of automated steps in Android Studio. First, your .java source files will be compiled into .class (bytecode) files, then into .dex (Dalvik executable) files. Second, the .dex files, .xml files, and other resources (e.g., images) needed by your app are bundled into an Android package (.apk) file.
button kicks off a series of automated steps in Android Studio. First, your .java source files will be compiled into .class (bytecode) files, then into .dex (Dalvik executable) files. Second, the .dex files, .xml files, and other resources (e.g., images) needed by your app are bundled into an Android package (.apk) file.
Next, if the AVD is not currently running, Android Studio will start it (this can take a minute or two, so be patient). Finally, the .apk file is signed and transferred to the AVD and your app will run!
You can interact with the emulator using your mouse to tap (click) and swipe (drag). Once the emulator has been started, you should leave it running; i.e., don’t close the window. The next time you run the app, Android Studio will be able to skip the time-consuming step where it starts the AVD.
Running an App on a Real Device
If you have one, it’s much more satisfying to interact with your app on an actual Android device. Since 99% of users will never develop an app, Google has hidden debugging/developer features that we need to enable.
To enable your device for development:
- Unlock your device and go to Settings > About Tablet (or About Phone).
- To enable developer mode on your device, scroll down to Build number and tap it 7 times. Congratulations, you are now a developer — welcome to the 1%.
- Go to Settings > Developer options.
- Enable USB debugging.
- Connect your device to your development computer via USB. You will see a message on your device asking you to Allow USB debugging, tap OK.
- If you are still running the AVD you should close it.
- Click the Run
 button. You should see the Select Deployment Target window. If everything is set up correctly, your Android device should appear under Connected Devices.
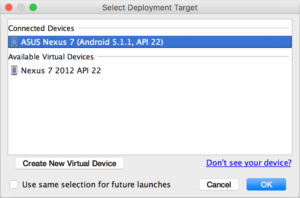
- Click to select your Android device and then click the OK button.
Android Studio will build your app, transfer the .apk file to your device via USB and run the app!
You Try!
- Carefully read and follow the instructions above to build the “Hello World!” App and execute it on an Android Virtual Device (AVD).
- If you have an Android device (tablet, phone etc..) try to configure it so that you can run the “Hello World!” app on that too.
- Without building an entirely new app, modify the “Hello World!” app so that it displays your name as part of the greeting message. Hint: This should not require any Java code changes, you only need to modify one of the app resource (.xml) files. Experiment with some of the other properties for the “Hello World!” TextView Can you change the font size and colour?
- Download and install Android Studio on your home computer. Test it by creating and running your own “Hello World!” app.