A Common Situation
In programming, loops are very commonly used to repeat a block of code a specific number of times, for example, display exactly 10 lines. As I mentioned, any problem requiring a loop can be solved using the while loop:
|
1 2 3 4 5 6 7 8 9 10 11 12 13 14 |
function setup() { createCanvas(400, 400) } function draw() { background(220) let count = 0 while (count < 10) { print(count) line(0,count*40, width, count*40) count++ // i.e., count = count + 1 } } |
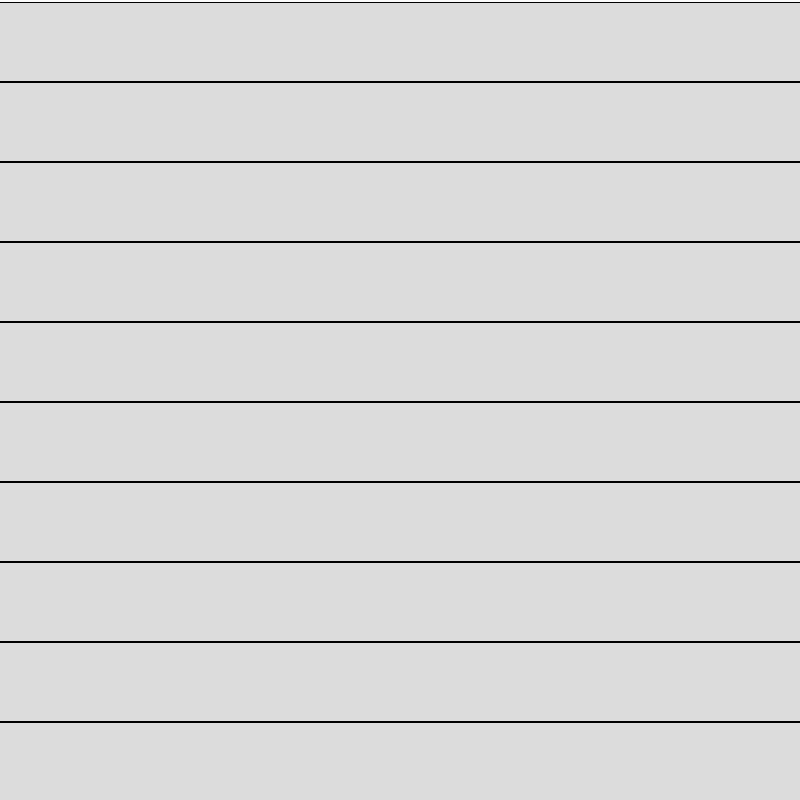
 This loop draws exactly 10 lines every time draw() is executed and displays the value of the count variable in the Console. Using print() to display a variable’s value can be very useful when trying to understand or debug a program.
Notice that the loop requires 4 elements to work: (1) a counter variable, (2) a condition to stop the loop after a specific number of times, (3) a { block } of code to repeat each time, and (4) a way to update the counter variable at the end of the { block }. You might also notice that I’ve moved the let statement inside the draw() function — more on this in a minute.
Incrementing (++) and Decrementing (−−)
Before we move on, you probably noticed the strange-looking statement on line 12.
count++
Adding 1 or subtracting 1 from a variable happens very often in programming. For this reason, you can use ++ after a variable to add 1 to its value, or — to subtract 1. In other words: count = count + 1 is the same as count++, and count = count – 1 is the same as count−−. This shorthand exists in most modern languages like Java and C/C++ (but not Python). Can you guess where the name C++ came from? Strange but true!
The for Loop
Ok, the while loop above works fine, but there is another (better!) way. Most languages include a special loop called the for loop that is designed to repeat a block of code a specific number of times. In Computer Science, we call such loops counted loops. Let’s look at the same example again, this time using a for loop:
|
1 2 3 4 5 6 7 8 9 10 11 12 |
function setup() { createCanvas(400, 400) } function draw() { background(220) for (let count = 0; count < 10; count++) { print(count) line(0,count*40, width, count*40) } } |
The for loop syntax above may look a little strange, but it’s used in many other languages (with exactly the same syntax) so it’s worth becoming comfortable with it!
All 4 required elements of a counted loop are here. Inside the for loop ( .. ) are actually 3 statements, separated by semi-colons. First, let count = 0 defines and initializes our loop control variable. Second, count < 10 is the same condition we used with the while loop. Third, count++ increases our loop variable. Instead of using count++ you could write count = count + 1 (or any other arithmetic expression you like). Fourth, the { block } of code that repeats is the same as before.
Although count++ appears at the top of the for loop it actually happens after the code in the { block } has finished. You can imagine it happening like this:
|
1 2 3 4 5 |
for (let count = 0; count < 10; ) { print(count) line(0,count*40, width, count*40) count++ } |
Scope: Global vs Local Variables
You’ve probably noticed that I’ve started moving the let statement from the top of our code inside the draw() function and even inside the for loop ( parentheses ). This is related to an important concept in programming, called scope. The scope of a variable determines where in the code you are allowed to access it.
Up to this point, we have used the let statement at the top of our programs to declare all of our variables. When a variable is created outside all functions like this it’s called a global variable. That means that the variable can be accessed inside any function of the program. I did this for convenience, and to avoid having to talk about scope until this point. Now you are ready!
As programs get longer and more complex, with more functions, it makes sense to try to limit the scope of variables as much as possible. Global variables are considered poor programming practice. For example, imagine you are working in a team of 100 programmers, you’d want to avoid the confusion of using the same names for variables of different purposes in a program.
By moving the let statement inside a function, you create what is called a local variable. This means that the variable can only be used within the function it is declared within. Look back at the while loop example above. On line 8, the count variable is defined for the first time using a let statement. This means that the count variable can only be referred to from that line until the closing brace } of the draw() function it is declared within. If we now tried to access (e.g., print(count)) in the setup() function like this:
|
1 2 3 4 |
function setup() { createCanvas(400, 400) print(count) // ERROR! } |
we would get a syntax error. This is considered a good thing!
A general rule of thumb when declaring a variable is that you want it to have the smallest scope possible, and try to avoid global variables when possible.
With the for loop, we take this to another level. By moving the let count = 0 statement inside the ( parentheses ) of the for loop the scope of that variable is only inside the { body } of the loop.
|
1 2 3 4 5 |
for (let count = 0; count < 10; count++) { print(count) // OK! line(0,count*40, width, count*40) } print(count) // ERROR! |
The last thing I’ll mention is that it is possible to declare a local variable with the same name as a global variable. In this situation, the program will use the local variable within its scope and the global variable everywhere else. Appreciating the importance of scope takes some experience, but with enough practice, you will develop good coding habits.
Which Loop is Best?
So, we now have 2 kinds of loops: while and for. Which one is the best? How do you know which one to use? There is really no “best” loop, and which type you should use depends on the problem you are trying to solve.
For situations where you know you need to repeat some code a specific number of times, the for loop is the preferred choice. When a professional programmer sees a for loop they immediately assume this is why you chose it.
For pretty much any other case the while loop is usually the right choice. There are many situations where the number of iterations can vary based on some condition, often these have to do with user input. For example, your code might need to keep repeating as long as the mouse pointer is within a certain bounding area.
You Try!
-
- Repeat Q2 from 2-1, but this time use a for loop.
-
- Here’s some example code that uses a while loop inside draw() to display a series of vertical bars (from left to right), each getting brighter according to the distance from the mouse:
|
1 2 3 4 5 6 7 8 9 10 11 12 13 14 15 16 17 18 19 20 |
function setup() { createCanvas(400,400) } function draw() { background(0) let x = 0 // While x is less than the width of the window while (x < width) { // Calculate distance between mouseX and x-coordinate of current rectangle let distance = abs(mouseX - x) // Use that distance as a greyscale value fill(distance) rect(x, 0, 20, height) // Increase x by 20 x = x + 20 } } |
Rewrite it using a for loop instead. Note: the abs() function takes a positive or negative number as an argument and returns the positive value of it. Just like math class: | -2 | = +2, and | 2 | = +2.
-
- It’s possible to have a loop inside another loop — these are called nested loops. Examine the code below, and rewrite it using a nested for loop instead:
|
1 2 3 4 5 6 7 8 9 10 11 12 13 14 15 16 17 |
function setup() { createCanvas(200, 200) } function draw() { // With a while loop let x = 0 while (x < width) { let y = 0 while (y < height) { fill(random(255), random(255), random(255)) rect(x, y, 10, 10) y += 10 } x += 10 } } |
-
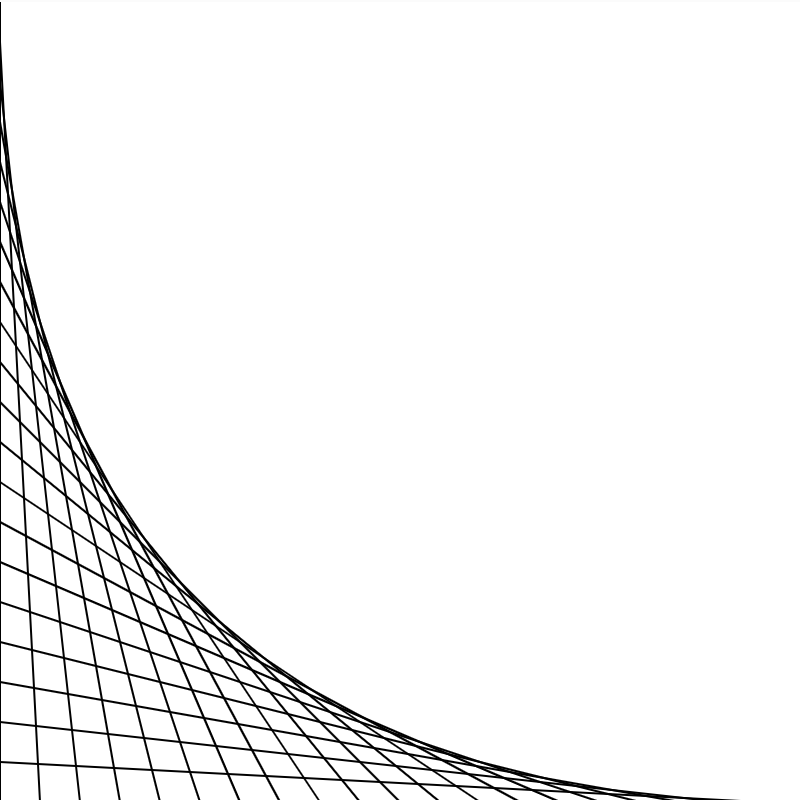
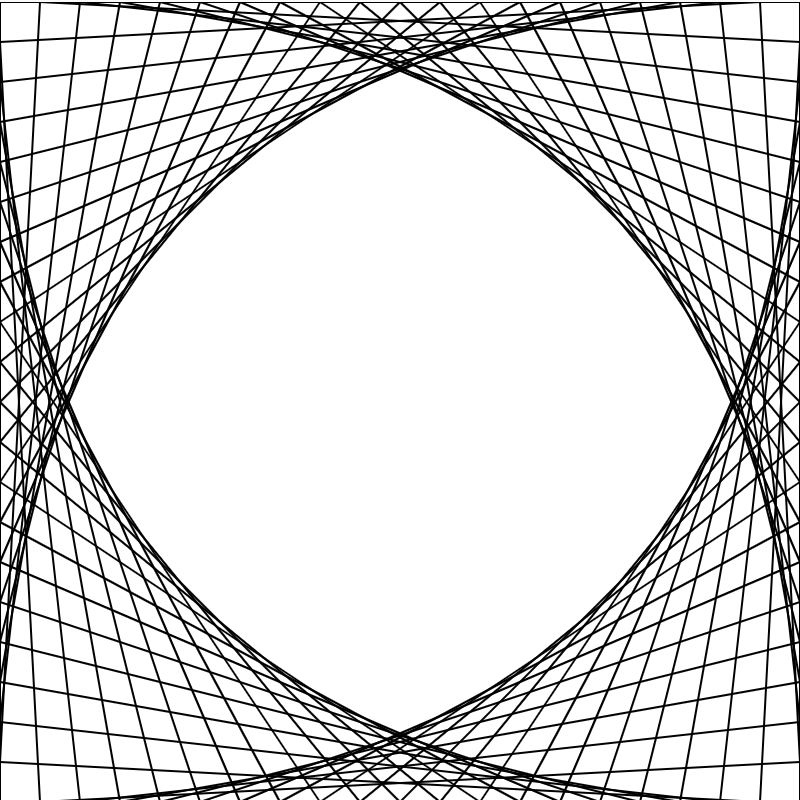
- Straight lines can be used to give the illusion of a curve. Assuming a canvas size of 400×400, the first image below consists of exactly 20 lines. The first line goes from (0,0) to (0, 400), the second line goes from (0, 20) to (20, 400), the third from (0,40) to (40, 400), and so on. This can be accomplished with a for loop using single line() function. Once you have it working in one corner, repeat the exercise for all four corners (as shown in the second image).

 Do you really need 4 for loops to produce the final spiral pattern? Try to do it with only 1 for loop, and add some color to jazz it up!
 - Extra Challenge: Draw a character that would fit within a 40×40 pixel box. Once you have this working, use for loops to “tile” the image 100 times on a 400×400 pixel canvas. Hint: can you do this using only 2 for loops?
- Straight lines can be used to give the illusion of a curve. Assuming a canvas size of 400×400, the first image below consists of exactly 20 lines. The first line goes from (0,0) to (0, 400), the second line goes from (0, 20) to (20, 400), the third from (0,40) to (40, 400), and so on. This can be accomplished with a for loop using single line() function. Once you have it working in one corner, repeat the exercise for all four corners (as shown in the second image).